Most garage owners think that a garage lighting setup for car detailing is simple. You just install a few tubelights in a funky manner on the ceiling for garage lighting setup for car detailing and the job is done. But when you start the real work, problems start to appear.
- Shadows near the wheels.
- Poor visibility during detailing.
- Missed scratches.
- Dark corners in storage areas.
Now it hits you…garage lighting is not about brightness but about detailed planning. Best garage lighting is designed around how the space is actually used. A repair zone or storage area lighting will be different for a detailing bay.
So, how do a perfect garage lighting look like?
- 30,000-40,000 lumens are best for a 400 sq. ft. two-car garage.
- 5000K-6500K with a 90+ CRI is the threshold for accurate color and detecting a scratch.
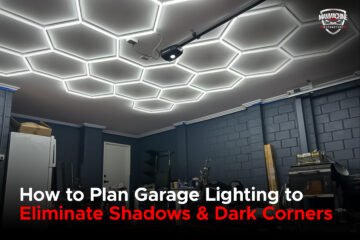
- The best lights for garage ceiling are hexagon garage lights
- High-bay LEDs and linear shop lights are most suitable for home garages. And if you have storage garages, they work better with motion-sensor LEDs and focused shelf lighting.
- Repair zones need task lighting and portable floodlights to avoid shadows
So before choosing a fixture, understand what your area needs. Best lights for garage ceiling let you see your projects clearly, work faster, stay safer, and deliver better results.
Best Garage Lighting: Why One Row Is Never Enough
Walk into most Indian garages and you will find the same layout: two or three tube lights or LED battens fixed in a straight line along the center of the ceiling. In a storage-only garage, this is adequate. In any garage where real work happens, it creates a problem that most owners never trace back to the lights.
A single row of lights positioned above the vehicle creates a pool of brightness on the roof and bonnet. The lower panels, door sills, rocker panels, and bumpers are in partial shadow. These are exactly the areas where damage happens:
- Stone chips accumulate
- Scratches develop
- Coating misses
Every detailer who has ever reworked a job because a client noticed defects in daylight that were missed in the studio has experienced the cost of this garage lighting failure firsthand. Good garage lighting is not about having enough light overhead. It is about having the right light reaching every surface of the vehicle from multiple angles.
If you are using a hand torch to inspect panel sections during a job, your overhead garage lighting is not doing its job. Remember…the torch should support your lights, not replace them.
The Garage Lighting Specs
Don’t let the fancy marketing terms lure you into something you will regret later. Kelvin, Lumens, and CRI are the actual factors when it comes to your garage lighting setup.
These specifications determine whether a garage lighting setup is professional grade or simply bright. Understanding these numbers before you buy anything is what separates a useful upgrade from an expensive mistake.
Brightness (Lumens)
A bright garage does not always mean a better garage. What matters is light distribution. For a standard two-car garage, you need around 30,000-40,000 lumens (75-100 lumens per square foot).
Too much brightness in one spot and shadows everywhere else? Congrats, you have made one of the most common garage lighting mistakes.
Lux for Shadowless Garage Lighting
Lux tells you how much light reaches the surface of your car. 150 to 300 lux is sufficient for general storage and parking. For mechanical repair work, 400 to 600 lux is the working standard. For professional detailing (paint correction, ceramic coating application, and PPF inspection), the active work bay needs a minimum of 750 to 1000 lux. High-end detailing studios operate at 1500 lux or above.
Color Temperature (Kelvin)
Does warm yellow lighting work for a car detailing setup? No. The ideal range is 5000K-6500K daylight white. It mimics natural sunlight and reveals scratches, swirls, coating patches, and paint defects. Most professional detailing studios go for around 5500K. Because they give a perfect balance of clarity and accuracy.
CRI (Color Rendering Index)
CRI is something that separates professional garage lighting from average LEDs. It shows you how accurately your vehicle appears under artificial light
Standard industrial tube lights score CRI 65 to 75. At this level, minor paint defects blend into the color, and coating high spots are nearly invisible. Professional detailing lights operate at CRI 90 and above. At CRI 95, every color is accurate, every defect is visible, and the standard of work you produce reflects that.
What you can spot with high CRI garage lighting:
- Swirl marks
- Buffer trails
- Uneven coatings
- Paint correction defects
- True paint color under daylight-like conditions
Professional Garage Lighting Standards at a Glance
Here are the ideal numbers as per your garage lighting needs:
| Specification | Minimum Standard | Professional Range |
| Color Temperature | 5000K | 5500K-6500K |
| Brightness | 75 lm/sq.ft. | 100 lm/sq.ft. |
| CRI Rating | 80+ | 90-95+ |
Garage Lighting for Detailing: What the Setup Looks Like
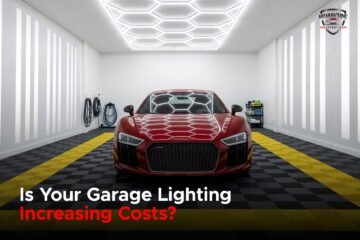
Professional detailing lights for a garage environment are not the same as general workshop lighting. The standard for a paint correction bay is a cross-lighting configuration where light sources are placed on side walls at a 45-degree angle to the vehicle, not just overhead. This wrap-around illumination fills the shadow zones that the car’s own body lines create and gives you clear visibility across every panel without repositioning the vehicle.
Hexagon Lights
Hexagon ceilings are a top choice when it comes to professional detailing studios. This is because the lights in this style help in distributing the light evenly across all areas of the studio. On the other hand, normal home lights trap heat, causing LEDs to degrade in brightness and color accuracy within two years.
Linear LED Tube Fixtures
4-foot or 8-foot LED lights are the most common ones if you’re looking for garage lighting ideas LED or garage LED lighting. They are the traditional option, but they work perfectly. It also has one of the easiest installations. They run over 50,000 hours with maximum lumens per penny. If compared with a hexagon, you might find it less appealing.
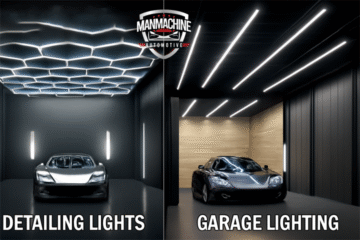
Hexagon vs Linear Tubes: Which is Better
| Feature | Hexagon LED Lights | Linear LED Tube Lights |
| Best For | Detailing studios | Workshops
Functional garages |
| Lighting Style | Diffused, shadow-free lighting | Overhead task lighting |
| CRI Availability | High CRI (95+) | Depends on fixture quality |
| Installation | Modular but complex | Simple and fast |
| Expandability | Easy to expand | Requires additional fixtures |
| Visual Appeal | Premium, modern look | Functional, industrial look |
| Cost | Higher upfront cost | Budget-friendly |
| Efficiency | Lower lumens per rupee | Maximum lumens per rupee |
| Common Issue | Premium pricing | Can create shadows |
Flicker-Free Driver Technology
Flicker-free driver technology is non-negotiable for any studio that produces video content. Standard LEDs use pulse-width modulation that creates strobing in camera footage. This strobing appears as dark horizontal bands in reels, before-and-after videos, and car reveal content. Studios investing in professional detailing lights with flicker-free drivers produce clean footage that requires no post-production correction.
Garage Lighting for Mechanical Repair: What Changes
Repair work has different lighting demands than detailing. A mechanic works under a vehicle, inside an engine bay, or on electrical components. He needs focused task lighting in addition to the ambient overhead setup. The ambient workshop lighting keeps the overall space safe and navigable. The task lighting goes where the work is happening.
Why Portable Task Lights Matter in Workshops
For workshop lighting in repair environments, magnetic-base LED work lights that can be positioned inside engine bays or underneath the vehicle are a practical necessity. A fixed overhead setup, no matter how bright, cannot reach every angle a mechanic needs. The combination of a high-output ambient ceiling setup and portable task lights covers everything.
Best Color Temperature for Repair Garage Lighting
Color temperature matters in repair environments too, though for different reasons than in detailing. In repair, 5000K to 6500K daylight temperature helps technicians read part numbers, distinguish wire color codes, and identify fluid types accurately. Warmer temperature light in a workshop makes these tasks harder and increases error rates.
Garage Lighting for Storage: What Is Actually Enough
Not every garage needs a professional-grade detailing light installation. A space used primarily for vehicle parking, seasonal storage, and occasional access to tools has straightforward garage lighting requirements.
Storage Garage Lighting Layout
High-output LED battens positioned in two parallel rows in garage lighting, one on each side of the ceiling, provide even coverage. Without the cost of a full professional grid.
Motion-Sensor Garage Lighting
Motion-sensor switching is a practical addition for storage garages. If the primary use of the space is retrieval, having the lights activate on entry and cut off automatically reduces electricity consumption.
Under-Shelf LED Lighting
For storage areas with shelving along the walls, under-shelf LED strip lighting makes locating items faster and eliminates the need to carry a torch to read product labels.
The principle is the same as for detailing and repair. The garage lighting setup should serve the activity, not the other way around. Buying a professional hexagon grid for a storage-only garage is unnecessary spending. Installing basic battens in a paint correction studio is a false economy that costs far more in rework, missed defects, and lost client trust.
Lighting Zones: The Setup Most Garages Get Wrong
A multi-use garage needs lighting zones. Separate circuits should be controlled independently. so that different parts of the space can be lit to different levels depending on what is happening at that moment. Running the full studio lighting at maximum output during a basic storage retrieval wastes electricity and is unnecessary. Lighting only the work bay during a long correction session while keeping the rest of the studio at ambient reduces glare and helps the detailer focus.
The 3 Garage Lighting Zones That Matter
Most garages rely on one bright ceiling light. Shadows, missed scratches, and poor visibility become a problem if you are also making this mistake. A proper garage lighting setup uses three lighting zones together. Because there is no ‘one solution’.
Zone 1: Overhead Lighting
This is your main lighting layer. The goal is even brightness in the garage. No overexposed spot. Multiple evenly spaced LED fixtures always work better. A few ultra-bright lights can not compete with that.
Zone 2: Side Lighting
Ceiling lights cannot properly illuminate:
- Lower panels
- Wheel arches
- Door sections
Side-mounted LEDs fill those shadows. Polishing, coating, and paint correction work easily.
Zone 3: Inspection Lighting
This is the final detail-check layer. Portable high-CRI inspection lights help reveal swirl marks, coating misses, and polish residue. They present other imperfections that fixed lights often miss.
Pro Tip: Zone planning is an electrical decision that must be made before the garage lighting setup is installed, not after. If you add circuits after the walls are painted and the floor is coated, you are getting into an expensive and disruptive plan. The zone plan should be at the same time as the layout.
Final Checklist for a Shadowless Garage Lighting Setup
Here are the steps to complete a shadowless garage lighting setup.
– CRI Matters: Apply CRI 90+ fixtures for proper paint correction and detailing.
– CrossLighting: Use lights at a minimum of 3 angles to eliminate shadows.
– Ceiling Coverage: Make sure lights are evenly spaced for the best garage ceiling lighting designs.
– Wall Lighting: Place vertical LEDs to reveal swirl, dents and scratches.
– Color Temperature: Use only daylight LED lights (5000K–6500K).
– 2 Car Garage Lighting Layout: Ensure that both bays receive an even amount of light.
– No Dark Corners: Check wheel wells, lower panels and corners for visibility.
– Test Before Final Install: Test using a defect panel or dark colored car to make sure the garage lighting is set up with no shadows.
– Smart Budgeting: Optimise performance and find the optimal solution for the garage lighting setup price.
– Modern Garage Lighting Ideas: Integrate clean designs with details visibility.
– Garage Lighting Ideas LED: Energy-efficient LED lights that offer long-lasting savings.
Why Manmachine Automotive Gets This Right
We have professional garage lighting and flooring to automotive studios and workshops. The detailing lights in the Manmachine Automotive range are built specifically for Indian operating conditions:
- aluminum housing for heat resistance in high-temperature environments
- flicker-free drivers for content-producing studios
- CRI ratings at 90 and above for environments where defect detection accuracy is a business requirement.
Check Out: Take a Look at Manmachine Automotive’s Garage Lighting Products
We give you a technical consultation based on how the space works. The difference between a lighting setup that was planned and one that was purchased and installed without planning is visible from the first day of operation.
We have professional garage lighting built for Indian workshops. Connect with Manmachine Automotive at +91-7683066826 to get a free quote.
Conclusion
No matter if you have used exported products for your clients, or you have done premium work. When you do not have a lighting system, you just end up guessing. It’s a journey to take from “bright” to “strategic garage lights”. A journey that can not be completed without meticulous consideration. It’s quite satisfying when there are no surprises when you pull your car outside. No visible marks, no swirls.
- Start with proper overhead garage lighting.
- Add side lighting to kill shadows.
- Keep an inspection light because ceiling lights cannot catch everything.
And if you are worried about the right garage lighting setup price, yes…it costs more upfront. But redoing work or losing customers will cost you more. Why? Because your garage lights hid the problem. Good garage lighting exposes mistakes before your client does.
Frequently Asked Questions
Q1. What CRI is required for professional detailing?
Ans: CRI 90 is the professional minimum. For paint correction and coating work on dark or metallic colors, CRI 95 gives the most accurate defect visibility.
Q2. How many lux does a detailing bay need?
Ans: A minimum of 750 to 1000 lux in the active work bay. High-end correction studios handling dark vehicles work at 1500 lux or above.
Q3. What is flicker-free lighting and why does it matter?
Ans: Flicker-free lights use high-frequency drivers that eliminate strobing in video footage. Essential for studios producing reels, before-and-after content, and car reveal videos.
Q4. Why is aluminum housing better than plastic in Indian garages?
Ans: Aluminum dissipates heat efficiently in temperatures above 40 degrees Celsius. Plastic traps heat, causing LEDs to yellow and lose brightness within two years.
Q5. Can the same lighting work for detailing and storage in one garage?
Ans: Not with a single fixed setup. Lighting zones on separate circuits allow different areas to be lit at different levels based on activity at any given time.
Q6. What color temperature is best for a detailing garage?
Ans: 6500K daylight. It provides the contrast needed to identify swirl marks, hazing, and coating imperfections that warmer temperatures mask completely.
Q7. What should be the height of my high bays?
Ans: Flush mounting or short pendants work best if you have 20 ft ceilings. You’ll need the punch of a Hyperlite LED High Bay Light so that foot-candles reach the floor. It is a high-ceiling commercial LED fixture.
Q8. How should my 2-car garage lighting layout look?
Ans: A good 2-car garage lighting layout should give your vehicle even and shadow-free coverage.
- Use parallel LED rows on the ceiling
- Add vertical wall lights for side visibility
- Leave no dark spots between the cars
- For the best results, choose CRI 90+ garage LED lighting
- 5000K–6500K daylight color temperature will work.
This setup works for car detailing, repairs, and modern garage lighting designs.
0 Comments