A shadow-free garage lighting is for the serious home hobbyist, not merely for detailing professionals. Fractions of an inch and subtle textures are significant. But you know the most frustrating part? Many enthusiasts have to work in their own shadow. Your body could be in front of thousands of lumens. Yet you would have to squint to see any defect. Because your body is blocking the primary light source. And this becomes one of the garage lighting challenges.
So, why does this happen? The reason is a little to no familiarity with light distribution principles. As a garage makeover expert, we have seen many DIYers make their garage more of a small warehouse. They have just a single high-output circular fixture placed in the middle of the room.
They do not understand the technicality here?
Let’s understand why this does not work as a garage lighting option.
- This circular fixture establishes a “hot spot” at the bottom
- High illumination levels taper quickly to the walls
- Ultimately, it results in producing long, hard shadow
What’s the way out? Simple. You need to go beyond the brightness. Your concentration should be on:
- Garage lighting layout
- Geometry of the garage fixtures
- Overlapping of light zones
In this blog, we will walk you through some garage lighting fundamentals, common problems with garage lighting, and garage lighting challenge solutions that can help you to transform your space and build a garage that is an extension of your personality.
The Problem With How Most Indian Garages Are Lit
Indian Garage Lighting Challenges
Walk into the majority of Indian garages…home setups or professional studios, and you will find the same basic layout. Two or three LED battens fixed in a straight row down the center of the ceiling. This is the default. It is responsible for more missed defects, more rework, and more client complaints than any other single factor in a working garage. Here are some common lighting challenges of a garage:
- Insufficient brightness
- Wrong color temperature
- Low CRI (<80)
- Shadows under body lines
- Glare from epoxy floors
- Voltage fluctuations and flicker
The Agitation
A single central row of lights creates a concentrated pool of brightness on the roof and bonnet of the vehicle. The lower third of the car, the door sills, rocker panels, bumpers, and wheel arches, sits in partial shadow. This creates a shadow gap. These are precisely the zones where stone chips accumulate, scratches develop, and coating application misses happen. A detailer who finishes a job under this kind of lighting and sends the car into daylight is taking a risk every single time. There is also no cross-lighting at 45°.
The Solution
A planned garage lighting layout covers every surface zone of the vehicle from multiple angles. Not more lights doing the same thing in the same position. A different configuration entirely. You need a hybrid lighting layout. If any panel of the car requires a hand torch during inspection, the overhead garage lighting plan has already failed. A torch is a backup tool, not part of a professional workflow.
Understand Lux and CRI Before You Buy Anything
total lumens, efficacy (lumens per watt), and color rendering act as performance measures in your garage lighting.
Lux
Lux is a measure of how much light actually reaches. General parking and storage needs 150 to 300 lux. Mechanical repair requires 400 to 600 lux. Paint correction, ceramic coating application, and PPF inspection require a minimum of 750 to 1000 lux. High-end studios working on dark-colored and luxury vehicles operate at 1500 lux and above.
CRI
CRI (Color Rendering Index) measures how accurately a light source shows colors compared to natural daylight. Standard industrial tubes score CRI 65 to 75. At this level, colors appear subtly distorted. Minor surface defects blend into the paint, and coating high spots become nearly invisible. Professional detailing lights are built to achieve CRI 90 and above. At CRI 95, you see exactly what the paint looks like in sunlight.
| Activity | Minimum Lux Required | Minimum CRI Required |
| General Parking / Storage | 150-300 | 70+ |
| Mechanical Repair | 400-600 | 80+ |
| Wash Bay / Decontamination | 500-750 | 85+ |
| Paint Correction / Coating | 1000-1500 | 90-95+ |
Color Temperature (CCT) Selection
Correlated Color Temperature (CCT) relates to perceived brightness and focus.
4000K (Neutral White):
- Excellent clarity
- Good for long sessions
- Low harshness
5000K (Daylight):
- High-precision tasks use
- Like noon sunlight
- Space feel more energetic
Did You Know?
According to the Bureau of Indian Standards certification under IS 16102, LED imports and sales in India come under BIS certification. So, for detailing setup in your garage, you should go for BIS-certified LEDs with 5000K CCT, CRI 90+, 7 McAdam steps.
Why Fixture Position Matters More Than Fixture Quantity
Adding more lights to a bad layout produces a brighter bad layout. The position of each fixture, not the count, determines whether shadows are eliminated or pushed to a different part of the panel.
Professional shadowless garage lighting is built on the principle of cross-lighting. Side wall panels are mounted at a 45-degree angle to the work bay. The light wraps around the vehicle from multiple directions simultaneously. This fill-light effect removes the shadow zones created by the car’s own body lines and character creases. These become visible without repositioning the vehicle or relying on a handheld lamp:
- The lower bumper
- Area beneath the door handles
- Transition between the bonnet and the wing panel
The ceiling grid handles the top half of the vehicle. The side wall panels handle the bottom half. Together, they make every square centimeter of paintwork is illuminated from at least two angles. This is the standard in every professionally built detailing studio, and it is achievable in any bay with the right garage lighting planning.
Why Linear Lights Work Better Than Round Lights in a Workshop
Why do shadows appear in your garage despite lighting?They depend on the type of light you use and where it is placed.
Round High-output Fixtures: act like a single strong light source. They create hard, sharp shadows. That’s why when you lean over your workbench, your head or shoulders can easily block the light. They leave your work area dark.
Linear High Bay Lights: LEDs are spread in a longer fixture. So, the light comes from multiple points, not from one spot. This creates light “wrap around” objects and harsh shadows are reduced. So, if one side of the fixture gets blocked, the other side is still lit up.
The 30% Overlap Rule
A simple way to reduce shadows? The light from nearby fixtures should overlap. A good rule is to have around 30% overlap between fixtures. About 30-36 inches above the floor.
Now your workbench gets light from more than one direction. So, if your body blocks one fixture, another fixture still fills in the shadow. You get even lighting and less strain on your eyes when working.
Planning Your Zones Before Choosing Your Fixtures
A garage that handles multiple activities needs a lighting plan built around zones. Not a single blanket installation. Each zone has different lux and CRI requirements, and running everything at the same level wastes electricity. It also produces the wrong kind of light in areas where precision is needed.
Wet Bay Zone
Decontamination, foam wash, and rinse work needs bright, even coverage with minimum 500 lux. CRI accuracy is less critical here than volume. The focus is safe, slip-free movement in a wet environment.
Dry Work Bay Zone
This is where your garage lighting plan earns its budget back. Paint correction and coating application require 1000 lux minimum, CRI 90 or above, cross-lighting from side wall panels, and a ceiling grid that distributes light evenly without creating hotspots or gaps. This zone is non-negotiable for professional studios.
Storage and Product Zone
300 to 500 lux is adequate. Under-shelf LED strips on product storage units make locating chemicals and tools faster. They also eliminate the need to carry a torch into the storage area.
Client Reception Zone
This area needs to be clean, bright, and professional-looking. The garage lighting here is as much a visual statement as it is a functional requirement. This is where the client’s first impression of your studio is formed.
Map your zones on paper before selecting a single fixture. The zone map tells you exactly how many circuits you need, where wall panels must go, and how much lux each section of ceiling must deliver.
The Electrical Planning Step Most People Skip
Zone lighting only works when each zone is on its own independent circuit with its own switch. Running the full studio at maximum output during a basic product retrieval is wasteful. Lighting only the correction bay during a multi-hour paint job while keeping the rest of the space at ambient reduces glare, improves focus, and cuts your electricity consumption during long sessions.
In India, power fluctuation is a real operational concern for lighting systems. Surge-protected MCBs are a practical necessity in any professional installation. A power spike that kills a ceiling grid of detailing lights is not a small repair bill, and it is entirely preventable with proper MCB selection at the installation stage.
Simple Workshop Lighting Layout Guide
Your fixture spacing should be right. It keeps your workshop bright and free from annoying dark spots. Easy way to plan it.
Step 1: Find the Mounting Height
The distance between the light fixture and the floor. For example, if your ceiling is 10 feet high and the light hangs 1 foot below it, the mounting height is 9 feet.
Step 2: Calculate the Maximum Spacing
A simple rule is to multiply the mounting height by 1.5.
So if your mounting height is 9 feet:
9 * 1.5 = 13.5
What it means: the fixtures should not be more than about 13.5 feet apart.
Step 3: Place Lights Around Your Work Area
Put the first row of lights above the front edge of the main work zone. You get the shadows off the surface.
Step 4: Position Linear Lights Right
If you use linear high bay lights, install them parallel to your workbench. This reduces glare in your eyes and spreads light more evenly.
Why Spacing Matters in Garage Lighting
What if the lights are placed too far apart? You’ll start getting dark strips between fixtures. For example, if you space lights 16 feet apart in a garage with a 9-foot mounting height, you will create uneven lighting and stronger shadows.
Our eyes adjust between bright and dark areas. That uneven brightness can also tire our eyes.
Shadow-free Garage Lighting: Quick Reference Table
| Ceiling Height | Mounting Height | Max Fixture Spacing | Recommended Brightness |
| 8 ft | 7.5 ft | 11.25 ft | 50-75 foot-candles |
| 10 ft | 9 ft | 13.5 ft | 75-100 foot-candles |
| 12 ft | 11 ft | 16.5 ft | 75-100 foot-candles |
| 14 ft | 13 ft | 19.5 ft | 50-75 foot-candles |
Practical Application for Your Garage
| Your Garage | Calculation | Result for India |
| Ceiling Height | 10 ft | Mounting Height = 9 ft (1 ft chain drop) |
| Max Spacing | 9 ft × 1.5 | 13.5 ft (around 4.1 meters) |
| Target Illuminance | 75-100 foot-candles | 750-1000 lux (Indian metric) |
| Hexagon Grid Tubes | 16×8 layout (128 tubes) | 2.5 ft between tubes for 4.1m bay |
Why Choose Manmachine Automotive Lighting Plans
Manmachine Automotive, backed by 39 years of trust in Manmachine Car Care, has been supplying professional automotive environments across India. The range of garage detailing lights offered covers:
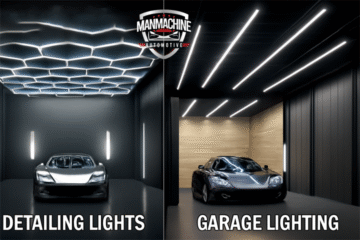
- Hexagon ceiling grids
- Aluminum housing
- Side wall linear panels
- Flicker-free driver technology
Aluminum housing is particularly important in the Indian context. Ambient temperatures in Indian studios exceed 40 degrees Celsius in summer. Plastic-housed LED fixtures trap heat internally. It causes LED chips to degrade in brightness and CRI accuracy in two years. The aluminum housing acts as a passive heat sink. It maintains consistent light output and color accuracy across a significantly longer product life.
Ready to Make Your Garage Lighting Shadowless? Contact Manmachine Automotive.
Conclusion
Planning the lighting for your garage is not about buying stuff. It is about making sure you do not have shadows. Indian garages face many challenges when it comes to lighting. But solutions are also there if you plan your space accordingly. Treat light as a tool, not just a brightness factor. Accurate light makes the work fast and enjoyable. Your customers will not find any defects, which will keep your reputation and work intact. No risk, rework, or refund.
Frequently Asked Questions
Q1. What is the minimum CRI needed for a detailing bay?
Ans. CRI 90 is the professional minimum. For multi-stage paint correction on dark or metallic colors, CRI 95 gives the most reliable defect visibility before daylight exposure.
Q2. How many lux does a correction bay actually need?
Ans. A minimum of 750 to 1000 lux in the active work area. Studios handling dark vehicles and PPF inspection regularly operate at 1500 lux for full surface coverage.
Q3. What is cross-lighting and why does it matter?
Ans. Cross-lighting places side wall panels at 45 degrees to the vehicle. This wrap-around coverage fills shadow zones that overhead-only setups leave on lower panels.
Q4. Why is circuit zoning important in a garage lighting plan?
Ans. Zoned circuits let different areas run at different levels based on activity. This reduces electricity waste and puts the right light intensity exactly where work is happening.
Q5. Does flicker-free lighting make a visible difference in videos?
Ans. Yes. Standard LEDs produce strobing in smartphone footage that editing cannot fully fix. Flicker-free drivers output continuous light that photographs and films cleanly every time.
Q6. What color temperature should a detailing garage use?
Ans. 6500K daylight. It produces the contrast needed to identify swirl marks, holograms, and coating high spots that warmer color temperatures mask completely on the surface.
0 Comments